
ในยุคที่เว็บทั้งหลายค่อยๆย้ายไปเป็น HTTPS HTTP2 ก็เป็นสิ่งที่ตามมาอย่างหลีกเลี่ยงไม่ได้ เนื่องจากช่วยเพิ่มประสิทธิภาพเว็บให้โหลดเร็วขึ้นกว่า HTTP1 อย่างมาก
ทีนี้มีserverเก่าอยู่ตัวนึงที่เป็น VPS ยังรัน CentOS 6 อยู่ แต่ก็อัพเดทไปจนสุดที่ 6.9 แล้ว การจะอัพไป CentOS 7 หรือ Distro อื่นที่ใหม่กว่าทำได้ค่อนข้างยาก เพราะไม่สามารถเข้าถึง หน้าจอหรือ CD-ROM ได้ และใช้เวลาอยู่พอสมควร การอัพเกรดแค่ Software ก็ถือว่าเป็นตัวเลือกที่ดี
ตอนแรกผมทำการอัพเกรด NGINX ไปเป็น version 1.12.2 ซึ่งรองรับ HTTP2 อยู่แล้ว (รองรับตั้งแต่ 1.10.0) ใส่ parameter listen 443 ssl http2; ง่ายๆแบบทั่วไป ปรากฎว่า HTTP2 ไม่ขึ้นใน Google Chrome ตอน start ก็ไม่มี Error เลยไปไล่หาสาเหตุก็พบว่า HTTP2 ใน Chrome ต้องการ ALPN ที่มีใน OpenSSL 1.0.2 ขึ้นไป ซึ่ง CentOS 6 ที่ใช้อยู่เป็น version 1.0.1e ซึ่งรองรับแค่ NPN (Next Protocol Negotiation) ซึ่งเลยต้องทำการ Compile NGINX ใหม่ ให้รองรับ OpenSSL 1.0.2
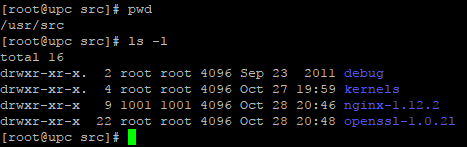
ขั้นตอนแรกให้ทำการ download source ของ OpenSSL 1.0.2 และ NGINX มาก่อน ของผมโหลดมาไว้ที่ /usr/src นะครับ แตกไฟล์ให้เรียบร้อย
จากนั้นก็ cd ไปที่ nginx-1.12.2 และทำการรัน configure ทีนี้เราไม่มั่นใจว่าต้องใส่ parameter อะไรบ้าง ก็เลยใช้วิธีลอกของเดิม โดยดูจากคำสั่ง nginx -V
[root@upc nginx-1.12.2]# nginx -V
nginx version: nginx/1.12.2
built with OpenSSL 1.0.1e-fips 11 Feb 2013
TLS SNI support enabled
configure arguments: — prefix=/etc/nginx — sbin-path=/usr/sbin/nginx — modules-path=/usr/lib64/nginx/modules — conf-path=/etc/nginx/nginx.conf — error-log-path=/var/log/nginx/error.log — http-log-path=/var/log/nginx/access.log — pid-path=/var/run/nginx.pid — lock-path=/var/run/nginx.lock — http-client-body-temp-path=/var/cache/nginx/client_temp — http-proxy-temp-path=/var/cache/nginx/proxy_temp — http-fastcgi-temp-path=/var/cache/nginx/fastcgi_temp — http-uwsgi-temp-path=/var/cache/nginx/uwsgi_temp — http-scgi-temp-path=/var/cache/nginx/scgi_temp — user=nginx — group=nginx — with-compat — with-file-aio — with-threads — with-http_addition_module — with-http_auth_request_module — with-http_dav_module — with-http_flv_module — with-http_gunzip_module — with-http_gzip_static_module — with-http_mp4_module — with-http_random_index_module — with-http_realip_module — with-http_secure_link_module — with-http_slice_module — with-http_ssl_module — with-http_stub_status_module — with-http_sub_module — with-http_v2_module — with-mail — with-mail_ssl_module — with-stream — with-stream_realip_module — with-stream_ssl_module — with-stream_ssl_preread_module — with-cc-opt=’-O2 -g -pipe -Wall -Wp,-D_FORTIFY_SOURCE=2 -fexceptions -fstack-protector — param=ssp-buffer-size=4 -m64 -mtune=generic -fPIC’ — with-ld-opt=’-Wl,-z,relro -Wl,-z,now -pie’
ก็ลอกทั้งหมดใน configure arguments: มา และก็เติม parameter — with-openssl=/usr/src/openssl-1.0.2l เข้าไปข้างหลัง
[root@upc nginx-1.12.2]# ./configure — prefix=/etc/nginx — sbin-path=/usr/sbin/nginx — modules-path=/usr/lib64/nginx/modules — conf-path=/etc/nginx/nginx.conf — error-log-path=/var/log/nginx/error.log — http-log-path=/var/log/nginx/access.log — pid-path=/var/run/nginx.pid — lock-path=/var/run/nginx.lock — http-client-body-temp-path=/var/cache/nginx/client_temp — http-proxy-temp-path=/var/cache/nginx/proxy_temp — http-fastcgi-temp-path=/var/cache/nginx/fastcgi_temp — http-uwsgi-temp-path=/var/cache/nginx/uwsgi_temp — http-scgi-temp-path=/var/cache/nginx/scgi_temp — user=nginx — group=nginx — with-compat — with-file-aio — with-threads — with-http_addition_module — with-http_auth_request_module — with-http_dav_module — with-http_flv_module — with-http_gunzip_module — with-http_gzip_static_module — with-http_mp4_module — with-http_random_index_module — with-http_realip_module — with-http_secure_link_module — with-http_slice_module — with-http_ssl_module — with-http_stub_status_module — with-http_sub_module — with-http_v2_module — with-mail — with-mail_ssl_module — with-stream — with-stream_realip_module — with-stream_ssl_module — with-stream_ssl_preread_module — with-cc-opt=’-O2 -g -pipe -Wall -Wp,-D_FORTIFY_SOURCE=2 -fexceptions -fstack-protector — param=ssp-buffer-size=4 -m64 -mtune=generic -fPIC’ — with-ld-opt=’-Wl,-z,relro -Wl,-z,now -pie’ — with-openssl=/usr/src/openssl-1.0.2l
ตามปกติก็จะสามารถ make;make install ได้เลย แต่ลองแล้ว error ครับ ลอง search ดูแล้วเค้าบอกว่าต้องเติม parameter -fPIC ตอน config openssl ด้วย ซึ่งจะรันตอนสั่ง make เราก็ต้องไปแก้ที่ /usr/src/nginx-1.12.2/objs/Makefile

จากรูปนะครับ เติม -fPIC เข้าไปหลัง ./config ในส่วนของ openssl
จากนั้นก็ cd มาที่ /usr/src/nginx-1.12.2 แล้วสั่ง make; make install ปกติได้เลยครับ
[root@upc nginx-1.12.2]# nginx -V
nginx version: nginx/1.12.2
built with OpenSSL 1.0.2l 25 May 2017
ลองสั่ง nginx -V ก็จะได้ OpenSSL version ใหม่แล้ว ลองเปิดหน้าเว็บด้วย Chrome ก็จะเป็น HTTP2 แล้วครับ